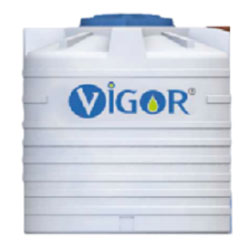
Water Storage
- Food Grade Plastic
- Multiribbed
- 100% UV Stability
- Anti Bacterial
- Anti Algae
- Easy To Clean
- life of More than 50 Years
500 | L750 L | 1000 L | 1500 L | 2000 L | 3000 L | 5000 L
WATER TANK
WATER TANK
| LAYER | MRP (Per Ltr.) |
|---|---|
| 3 LAYER | 6.30 |
| 4 LAYER | 7.30 |
| 4 LAYER FOAM | 8.10 |
| 5 LAYER | 8.80 |
| 7 LAYER | 12.10 |
Standard & Specification
PROPERTIES OF UPVC PIPES:
Vigor water storage are engineered to offer reliable and efficient water storage solutions, often characterized by the following properties:
Material Selection:
Vigor water storage tanks are commonly constructed from durable materials such as high-density polyethylene (HDPE), fiberglass, or stainless steel. These materials are chosen for their strength, resistance to corrosion, and ability to maintain water quality.
Capacity Range:
Vigor tanks are available in a wide range of capacities to meet various water storage needs, from small residential tanks to large-scale industrial or municipal storage systems.
UV Resistance:
Many Vigor tanks are UV-resistant, designed to withstand prolonged exposure to sunlight without degradation. This ensures the longevity of the tank and helps maintain water quality over time..
Sealing and Closure Systems:
Vigor tanks are equipped with secure sealing and closure systems to prevent leaks and contamination. This includes features such as threaded lids, gaskets, and locking mechanisms to ensure a tight seal.
Maintenance Requirements:
Vigor tanks are designed to require minimal maintenance, with smooth interior surfaces that are easy to clean and disinfect. Routine inspections and cleaning are recommended to ensure optimal performance and water quality.
Modularity:
Some Vigor water storage tanks are modular in design, allowing for easy expansion or customization as water storage needs evolve. Additional tanks can be added to the system as required, providing scalability and flexibility.
Insulation Options:
Depending on the application, Vigor tanks may be available with insulation options to help regulate water temperature and prevent freezing in colder climates. This is especially important for outdoor or above-ground installations.
Easy Installation:
Vigor tanks are designed for easy installation, with options for above-ground, underground, or even elevated installations. They typically come with detailed installation instructions and fittings for straightforward setup.
Note: Vigor CPVC pipes means unplasticised polyinylchloride pipe, also frequently referred to as rigid PVC pipe. The word rigid does not explain its structure, but denes a property, which is self explanatory.
Installation Guide
Easy and 100% leakproof installation.
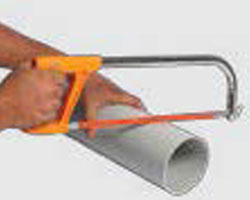
Step 1: Cutting
Measure the pipe length accurately and make a visible marking using a felt tip pen. Ensure that the pipe and fittings are size compatible. You can easily cut with a plywood cutting saw/ ratchet cutter or a wheel cutter. Cutting the pipe as squarely as possible (at 90°) provides optimal bonding area within a joint. Inspect pipe ends thoroughly prior to making a joint. If a crack or splintering is noticed cut-off a minimum of 25 mm beyond the visible crack before proceeding.
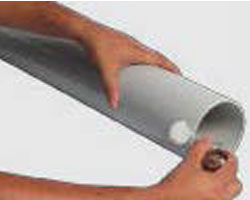
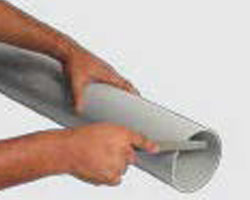
Step 2: Deburring/Beveling
Burrs in and on pipe end can obstruct flow/proper contact between the pipe and socket of the fitting during assembly and should be removed from both in and outside of the pipe. A 15 mm dia half round file/a pen knife or a deburring tool are suitable for this purpose. A slight bevel on the end of the pipe will ease entry of the pipe into the socket of the fitting socket.
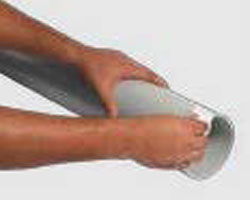
Step 4: Fitting Preparation
Using a clean dry rag, wipe the dirt and moisture from the fitting sockets and pipe end. Dry fit the pipe to ensure total entry into the bottom of the fittings socket and make a visible marking using a felt tip pen.
Step 5: One Step Solvent Cement Procedure
Use only Ashirvad FLOWGUARD PLUS™ CPVC Solvent cement conforming to ASTM F-493 to ensure a perfect solvent weld Joint. When making a joint, apply an even coat of solvent cement at the end of the pipe and also inside the fitting socket. Do not use thickened or lumpy solvent cement. It should have a flow consistency like that of syrup or paint.
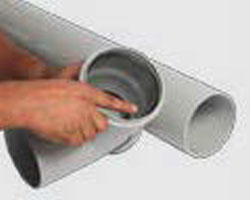
Step 5: Assembly
Immediately insert the pipe into the fitting socket, rotate the pipe 1/4 to 1/2 turn while inserting. This motion ensures an even distribution of solvent cement within the joint. Properly align the fittings as per patented alignment system shown with picture diagram on the right side. Hold the assembly for 30 seconds to allow the joint to setup and avoid push-out.